|
|
|
 |
how to adjust a Rain Bird rotor head
Arc Adjustments
Align Fixed LEFT Edge:
1. Pull up turret and turn to the left trip point (counterclockwise).
CAUTION: If the rotor does not turn easily to the left, first turn it
right (clockwise) to the right trip point.
2. Rotate entire case to the desired fixed left position, OR unscrew
cap and pull out assembly. Rotate internals to re-align left trip
point to the desired point and re-install.
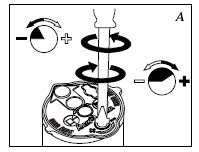
To increase or decrease the arc: (A)
1. While holding the nozzle turret at the fixed LEFT stop, insert tool
or screwdriver into the adjustment socket.
2a. Turn the screwdriver clockwise, (+) to INCREASE arc.
2b. Turn the screwdriver counterclockwise, (-) to DECREASE arc.
3. Each full clockwise turn of the screwdriver will add or remove 90
degrees of arc.
4. When the maximum arc of 360 degrees or minimum arc of 40
degrees has been set, you will hear a ratcheting noise. Do not
adjust the rotor beyond the maximum or minimum arc.
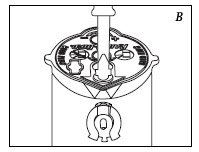
Radius Adjustment: (B)
1. Insert screwdriver into the radius adjustment socket.
2. Turn the screwdriver clockwise to reduce radius, and
counterclockwise to increase radius. |
|
|
|
|
Copyright © 2010 IrrigationRepair.com - All Rights Reserved |
|